How to Change DNS on TV Box Android & Amazon Fire Stick
Here’s a clear, step-by-step guide you can use for Android TV Box and Amazon Fire Stick, to change DNS to Cloudflare or Google 👍
(Simple, website-friendly)
✅ Why Change DNS?
Faster channel loading
Fewer buffering issues
Better connection stability
Bypass some ISP DNS problems
🌐 DNS Addresses to Use
Cloudflare DNS
Primary:
1.1.1.1Secondary:
1.0.0.1
Google DNS
Primary:
8.8.8.8Secondary:
8.8.4.4
📺 How to Change DNS on Android TV Box
Method 1: Ethernet (LAN)
Go to Settings
Open Network & Internet
Select Ethernet
Choose IP Settings
Change from DHCP to Static
Enter:
IP Address (keep same)
Gateway (keep same)
DNS 1 →
1.1.1.1or8.8.8.8DNS 2 →
1.0.0.1or8.8.4.4
Save & Restart the TV Box
Method 2: Wi-Fi
Go to Settings → Network & Internet
Select your Wi-Fi network
Choose Advanced / Modify network
Set IP Settings to Static
Enter DNS values
Save changes and restart
🔥 How to Change DNS on Amazon Fire Stick
⚠️ Fire Stick does not allow direct DNS change, so use manual network setup.
Steps:
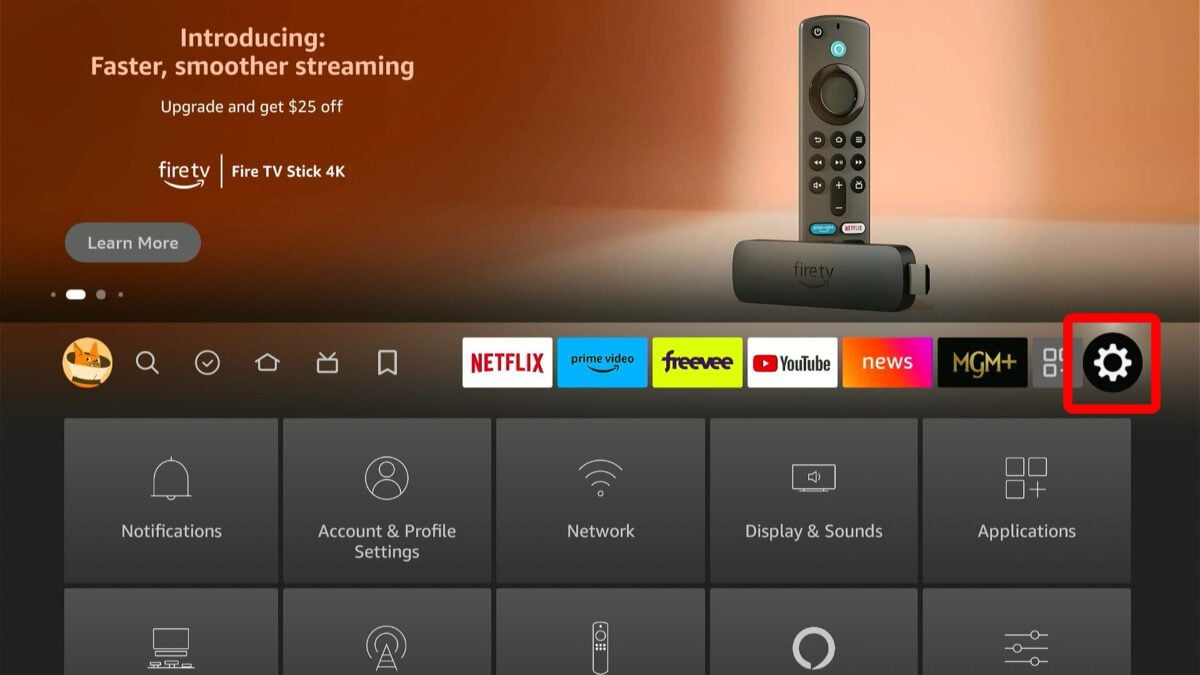
Go to Settings
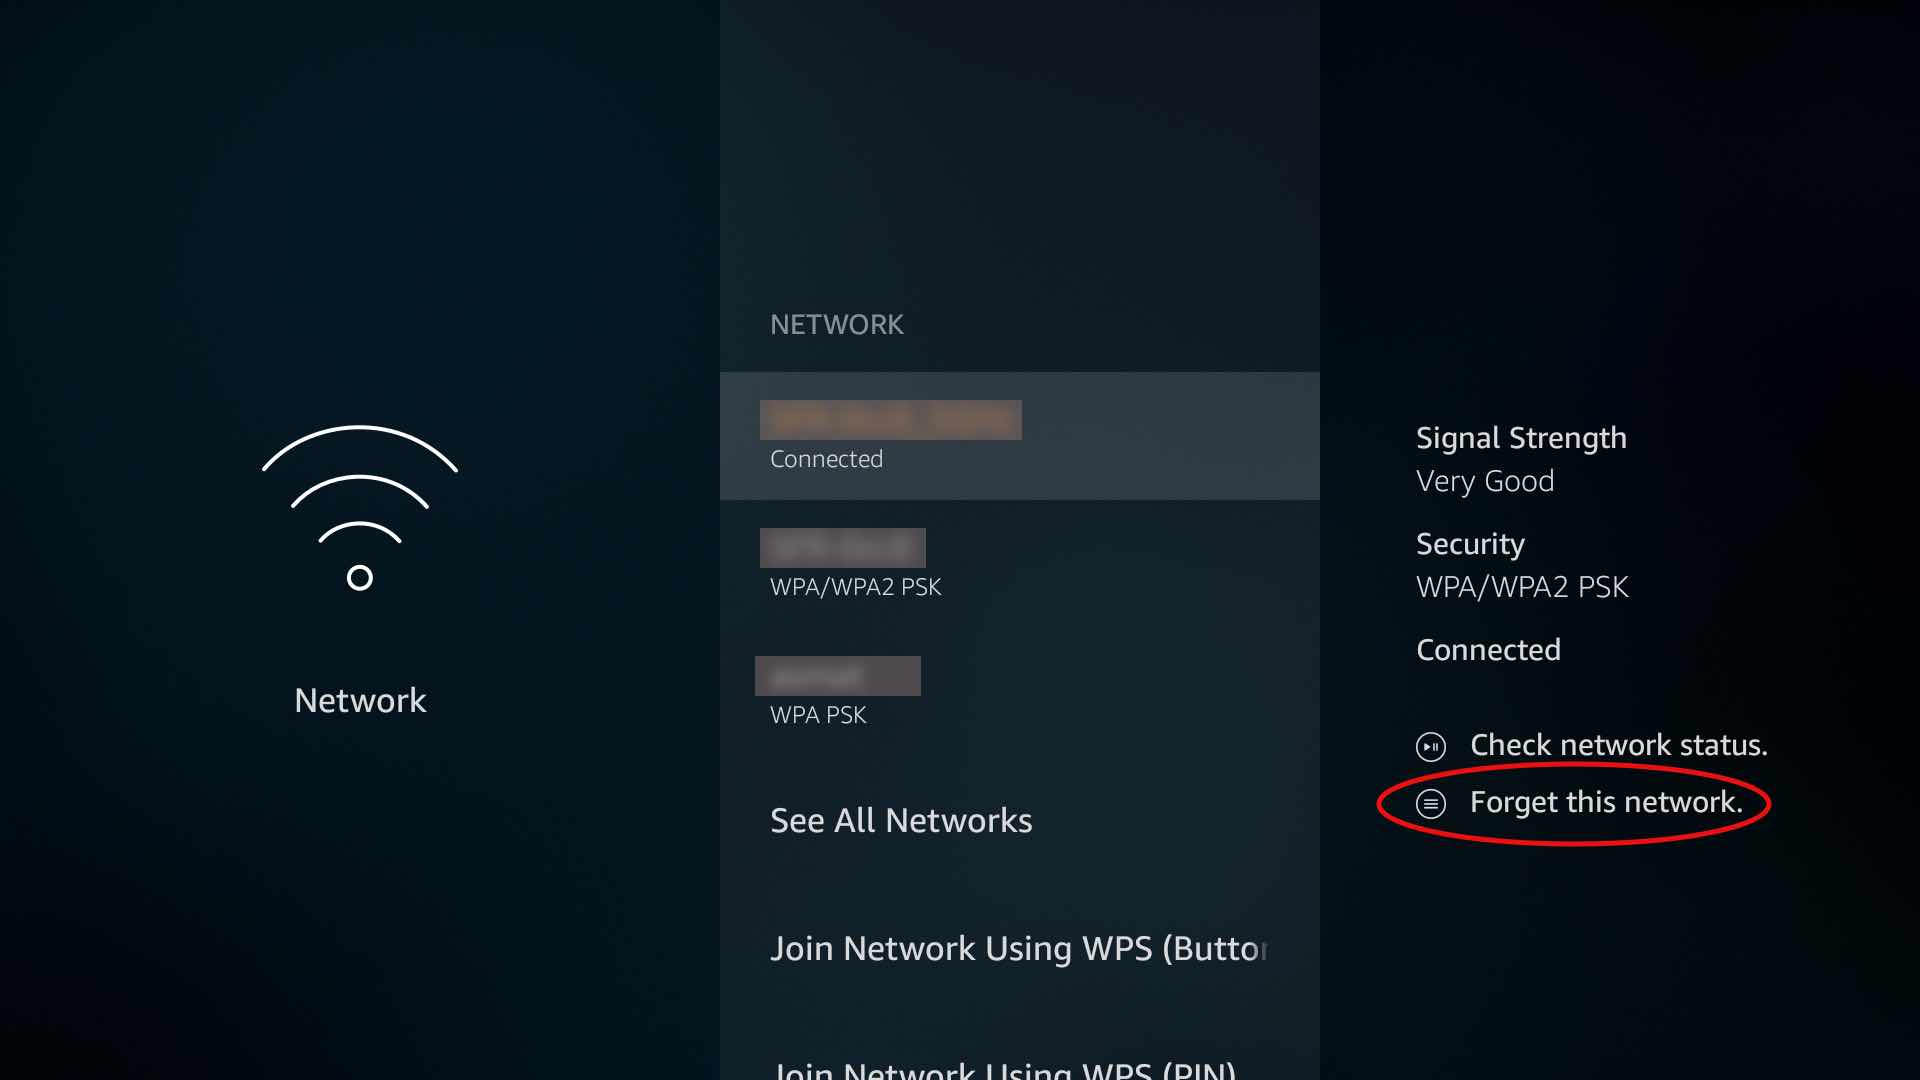
Open Network
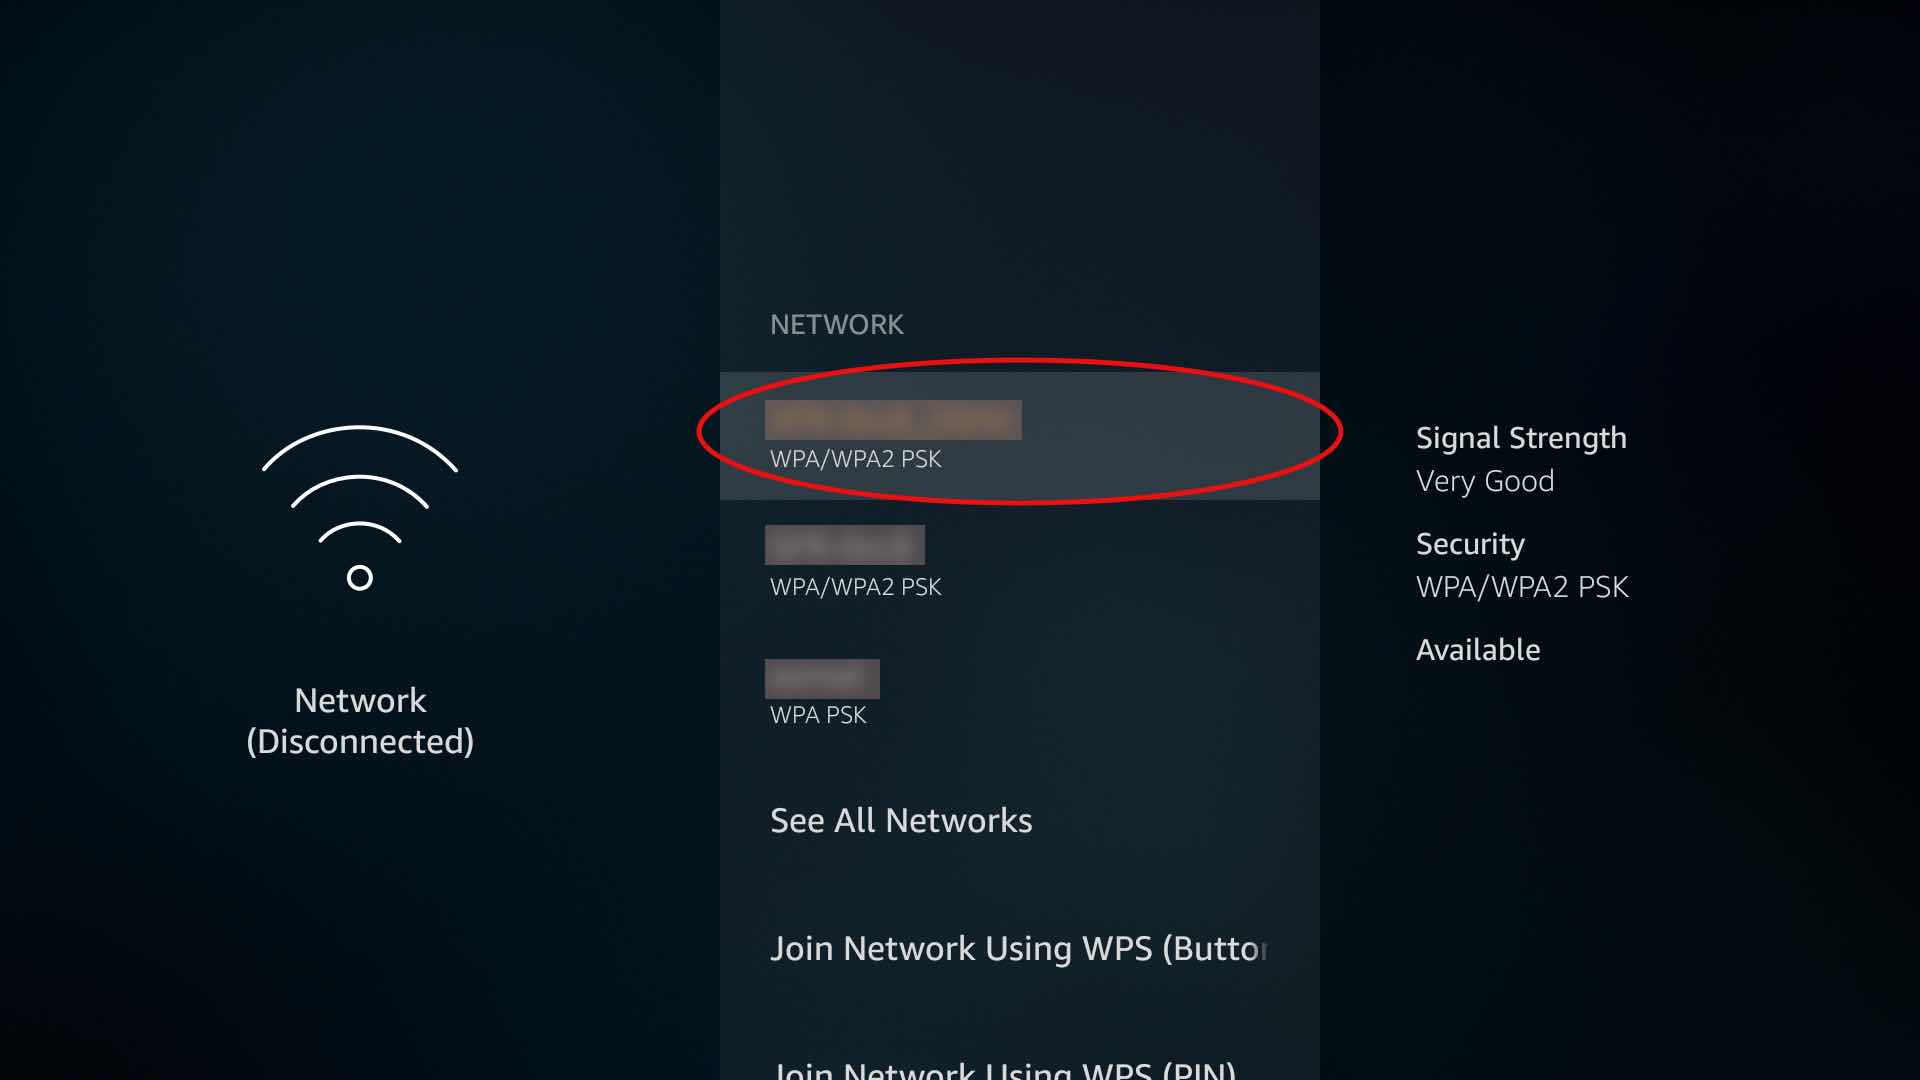
Select your Wi-Fi → press Menu (☰) → Forget
Reconnect to the same Wi-Fi
When IP settings appear:
Choose Advanced
Enter IP Address (same as before)
Gateway (router IP, e.g.
192.168.1.1)Netmask →
255.255.255.0
Enter DNS:
DNS 1 →
1.1.1.1or8.8.8.8DNS 2 →
1.0.0.1or8.8.4.4
Finish setup and restart Fire Stick
✅ Tips
Restart the device after changing DNS
Use Cloudflare for speed & privacy
Use Google DNS for stability
If internet stops working → revert to Automatic (DHCP)